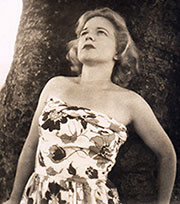
Betty
McLaren has been producing the ceramic “animals” for over 60 years
and she still continues to do so, now in her 90’s from her studio in Merimbula,
Australia
Below Betty explains in detail the rather lengthy process of
making one of the most well known of McLaren Pottery pieces, the large "Taurean
Bull".
...Over
the years many people have asked me just how the pottery pieces get from basic
clay to pottery art. Well, no doubt every potter has his or her own tricks of
the trade but the basics are the same for all. So let me describe how I do it,
and for illustration purposes I’ve chosen the making of a McLaren Bull.
The method I use is called slipcasting whereby the basic clay is introduced
into a mould to form the required shape. More intricate pieces often require
more than one mould to make up the complete object. The McLaren Bull uses two
moulds, one for the head and one for the body.
Production..
Preparing
the Clay Slip
The
layman could be forgiven in assuming that clay is clay and can be merely induced
into the mould ‘as is’. Alas, nothing in life is ever that that
simple and the clay slip must be mixed with a care that comes from long experience.
Mixing clay with plain water is a recipe for disaster – the resultant
mix would bind together in a lumpy, unworkable mess.
In earlier days I mixed my own slip to a formula Gus had worked out. It comprised
of different proportions of Ball C Clay, Ball F Clay, Talc, Silica, Kaolin and
other ingredients. To this I added water and an electrolyte that acted as the
deflocculent to stop the particles binding together. This mix of clay, water
and electrolyte had to be churned to a smooth consistency. This was heavy work,
especially for me - an Amazon I am not! It was Gus McLaren’s brother John
who came up with the solution. He converted an old washing machine into a clay
mixer.
Nowadays I use a prepared powder clay mix rather than the raw clay
of yesteryear. It comes in 25Kg bags to which I add the water, Dispex (a proprietary
deflocculent) and electrolyte. I must confess that initially I was somewhat
sceptical of the new-fangled powdered clay. Old habits die hard. But now I
am a convert, especially as it eliminates the need for storing multiple containers
of different clays and materials and, most importantly, it really works. I
still use John McLaren’s ingenious old washing machine adaptation though.
Once I’ve weighed out the correct mix and ‘felt’ for the
right consistency the machine does all the hard work. The mix is left to mature
for a few days, turning the machine on periodically to keep the mix consistent
and, importantly, to keep everything in suspension..
Casting
the Bull
Sounds
like an Olde Worlde English game, or something Aussie men do after a few beers.
But in this case it refers to casting the two shapes (head and body) that make
up the Bull.
Each of these shapes is itself made up of multiple pieces that are fitted together
to form the complete mould. In the case of the bull the head mould comprises
two pieces, and the body three pieces. The pieces that make up these moulds
must be held together and I’d like to pretend that I use a highly technical
piece of equipment to do this, but I don’t. Instead I use rubber bands
made from old car inner tubes!
The slip by now is viscous clay suitable for pouring into the mould. However,
before transferring it from my washing machine mixer to the mould, I first sieve
it to eliminate any remaining lumps or impurities. Once I am happy then I pour
the slip into the multi-piece moulds.
The moulds are porous allowing the slip to gradually dry out. The drying time
depends on many factors: The size of the mould and the volume of liquid clay
it contains, viscosity of the slip, ambient humidity, the weather, and more.
An important factor is the dryness of the mould itself since most of the drying
process is by the water absorbsion though the mould walls. Getting it right
in the face of these many variables is only arrived at after years of experimentation
and experience and can’t be explained here. The only way to know it is
to do it.
In the case of the Bull the initial drying takes about 30 minutes for the head
and 45 minutes for the body. By then the component parts are sufficiently robust to
be removed from the moulds. Now it is time to attach the head to the body. I
do this by scoring the head and the body where they are to connect and
then joining them using wet slip. Finally I use one of my home-made wooden or
metal tools to smooth over the join making it invisible to the eye. This process
is called fettling.
Adding
the Decoration
The bull is now at a stage where it is sufficiently dry
to give it strength but still malleable. Now comes the decorative process.
I use a combination of incised decoration, cut-outs and added clay strips.
None of these operations are automated; they are all carefully handcrafted.
Thus every Bull is slightly different and the result of many hours of creative
labour. The complete Bull is now left for a few days or so to fully dry out.
Engobing
When
the Bull is completely dry it is painted with an engobe. This is a slip to which
is added different oxides which, after firing, will impart different colours
to the finished artwork. For example copper for a green finish, cobalt for a
blue finish, manganese for colours in the red spectrum, and so forth.
Before firing the engobes all look much the same – a sort of muddy brown.
That’s why you’ll see small ‘dot’ marks on the underside
of the Bull. This is a trick I learned in the 50s from Reg Preston, a notable
potter and one of the founders of Potters Cottage. They are my way of keeping
track of which oxide has been added to the engobe and thus the final colour
of the Bull after firing.
Bisque
Firing
This
first stage firing hardens the Bull and fuses the engobe into the surface.
The firing is done at around 1000°C and takes in the region of 5 or 6 hours
hours. A further 12 hours or so must be left before opening the kiln to move
on to the next stage. When the kiln is finally opened the Bull is fully hardened
and ready for glazing. The underlying colour imparted by the engobe is not revealed
at this stage – that only happens after the second firing which is called
the glaze firing.
Glazing
and Glaze Firing
Glazing
the Bull involves painstaking work. First the Bull is placed in a ‘glazing
cubicle’ which is enclosed on three sides to contain the over-spray from
my airbrush. Then it’s on with my facemask and protective clothing to
spray the glaze itself.
The glaze I use is called White Matt which I am told by my suppliers is rarely
used by other potters; in fact they have to make it up specially when I place
an order. As the glaze is sprayed on it looks like a plain white matt coating
but during firing the particles fuse together to form a transparent matt layer
Once the glaze has been sprayed on we are ready for the final glaze firing.
This again takes around 5 or 6 hours but this time the temperature is somewhat
higher at about 1080 to 1100°C. As might be expected more cooling time is
needed, usually about 15 hours. I have to be very careful in placing the Bull
in the kiln. I wipe the underside of the feet on a wet blanket to avoid it sticking
to the kiln shelves. Also I must be ultra careful that no two pieces of pottery
are in contact, because even the slightest contact would result in the pieces
fusing together ruining both pieces of pottery.
The placement of various pieces in the kiln is also important and again is a
matter of long experience. Different colour engobes fare better at different
heights in the kiln – since at this stage the final colour does not show,
my dot marking system comes into play. (see further
explanation & images of "dot" markings in Signatures & Authenticity
Section of this website)
If you tot up the times above you can appreciate that firing alone is lengthy
process - around 40 hours from the start of bisque firing to finally removing
the Bull from the kiln after glaze firing. Add in the times previously spent
on mixing, casting, decorating, engobing and glazing, and you’ll appreciate
that a McLaren Bull is not exactly a quick undertaking – and that’s
no bull!


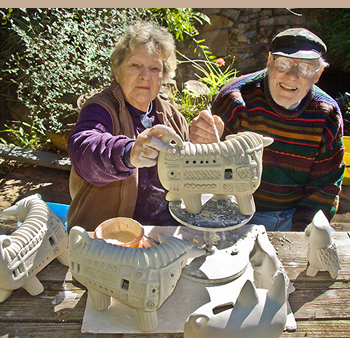
Betty
in her showroom at home
left.
Betty putting finishing touches to glazed salt and pepper shakers